Mastering the Art of Filmmaking with Your Gimbal Camera
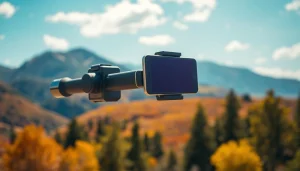
Introduction to Gimbal Cameras
In a world where visual storytelling reigns supreme, capturing smooth and steady footage is paramount. This is where the gimbal camera comes to the forefront, revolutionizing how creators approach their craft. Gimbal cameras serve as pivotal tools for videographers and filmmakers, allowing them to produce professional-grade footage without the shakes and jitters that can detract from their narratives. This comprehensive guide aims to delve into the intricacies of gimbal cameras, exploring how they work, the benefits they bring to cinematography, and practical tips for choosing, setting up, and utilizing these essential devices to their fullest potential.
Understanding Gimbal Technology
A gimbal camera operates on the ingenious principle of stabilizing movement through a combination of mechanical and electronic components. At its core, a gimbal uses three axes—pitch, roll, and yaw—controlled by motors to keep the camera level, regardless of the operator’s motion. This technology is crucial for eliminating the unintended movements that occur during filming, allowing for an impressive level of control and stability in your shots.
As technology has advanced, gimbals have become more sophisticated, incorporating advanced sensors and algorithms that continuously adjust the camera’s position in real-time. Whether you’re filming action-packed scenes or serene landscapes, the ability of a gimbal to adapt to sudden movements ensures that your footage maintains a professional quality.
Benefits of Using a Gimbal Camera
The advantages of integrating a gimbal camera into your filmmaking toolkit are manifold. Firstly, gimbal cameras significantly enhance the stability of your shots, creating a cinematic feel that is otherwise difficult to achieve. Unlike handheld footage that may come across as shaky, gimbals stabilize movements, resulting in smoother transitions and less viewer distraction.
Additionally, gimbal cameras provide versatility in filming techniques. You can execute dynamic moves such as pans, tilts, and follows with precision. This versatility extends to various shooting formats, whether you’re capturing events, vlogging, or producing high-quality content for social media.
Furthermore, gimbals often come with additional features such as time-lapse and tracking modes, allowing for creative expressions that would be tedious or impossible to accomplish manually. This not only expands the creative options for filmmakers but also minimizes the learning curve associated with producing stable video footage.
How Gimbals Enhance Video Stability
The effectiveness of a gimbal lies in its ability to stabilize footage during motion. When using a traditional camera setup, even the slightest hand movement can lead to unsteady shots. A gimbal counteracts this by isolating the camera from the motion of the operator. For instance, when walking, if the gimbal’s motors detect a downward or upward motion, they make instantaneous adjustments to keep the camera level.
This mechanism functions similarly to a pendulum, where the weight distribution creates a stabilizing effect that dampens any disturbances during filming. For creators shooting dynamic or fast-paced content, such as sports or action scenes, this technology becomes an invaluable asset in ensuring the captured images remain fluid and engaging.
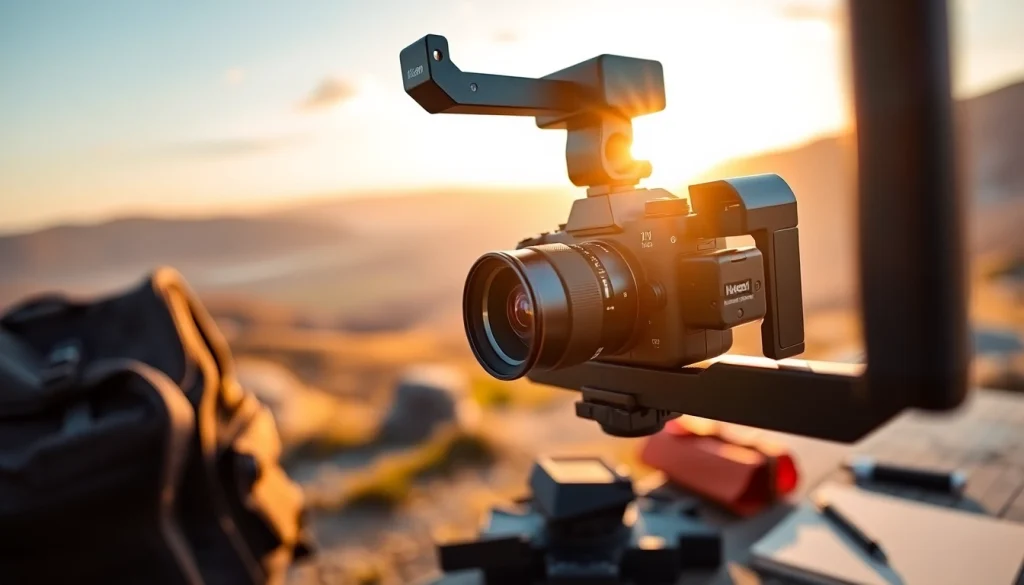
Choosing the Right Gimbal Camera
When it comes to selecting the ideal gimbal camera for your needs, various factors should be considered. Understanding the different types of gimbals, their key features, and the distinctions between budget and high-end options will empower you to make an informed decision.
Types of Gimbals: A Breakdown
Gimbals are commonly divided into three main categories: handheld, body-mounted, and tripod gimbals. Each type serves specific needs and scenarios:
- Handheld Gimbals: These are the most popular among independent filmmakers and vloggers. They offer portability and ease of use, allowing for quick setups and adjustments. Handheld gimbals are lightweight and can accommodate various camera sizes, making them suitable for both amateur and professional filmmaking.
- Body-Mounted Gimbals: Designed for capturing footage while on the move, these gimbals are fixed to the body of the user. This type provides exceptional stability, particularly when walking or running. They are ideal for action shots or narratives that require fluid motion.
- Tripod Gimbals: Typically used for static shots, tripod gimbals can be locked in place to obtain steady, low-angle shots or time-lapses. These gimbals allow operators to adjust height and angle easily, perfect for creative compositions.
Key Features to Look For
When evaluating a gimbal camera, several key features can enhance your shooting experience:
- Payload Capacity: Ensuring the gimbal can support the weight of your camera is critical. Always check the gimbal’s payload limit to prevent damage during operation.
- Battery Life: A longer battery life allows for extended shooting sessions. Consider gimbals equipped with removable batteries for easy replacement during longer shoots.
- Control Options: Look for intuitive controls, including joystick or smartphone app connectivity, that allow for seamless adjustments while filming.
- Build Quality: A sturdy build can withstand the rigors of filming in various environments, guaranteeing longevity and reliability during use.
- Compatibility: Ensure the gimbal is compatible with your camera setup. This includes checking for features such as quick-release plates and adjustable mounting systems.
Budget vs. High-End Options
The market offers a wide range of gimbal camera options across different price points. Budget-friendly gimbals can provide decent stabilization for those just starting their filmmaking journey. However, for seasoned filmmakers or professionals, investing in a high-end gimbal often results in greater stability, advanced features, and durability.
When navigating this landscape, weigh your needs against your budget. Exploring user reviews, product comparisons, and potential rental options can help you determine which gimbal fits your specific requirements without breaking the bank.
Setting Up Your Gimbal Camera
The process of setting up a gimbal may seem daunting at first, but with a systematic approach, it can be quite straightforward. Below, we’ll dissect the essential steps for assembling your gimbal, selecting compatible lenses and accessories, and fine-tuning your settings for optimal performance.
Assembling Your Gimbal: Step-by-Step
Setting up your gimbal camera involves several crucial steps:
- Balance Your Camera: Before powering on your gimbal, make sure your camera is securely mounted and balanced. This prevents motor strain and ensures smooth operation.
- Adjust Axes: Most gimbals require adjustments to align the camera’s center of gravity. Follow the manufacturer’s guidelines for the optimal balance.
- Calibrate Your Gimbal: Once balanced, power on your gimbal and go through the calibration process. This typically involves moving the camera slowly to allow the gimbal to recognize its positioning.
- Connect Accessories: If applicable, attach external microphones or lights and ensure they are not affecting the gimbal’s balance.
Choosing Lenses and Accessories
Selecting the right lenses and accessories enhances the versatility of your gimbal camera. Lightweight lenses are preferable to prevent overloading the gimbal motor. Additionally, consider using prime lenses for their superior sharpness and lightweight design.
Accessories such as a follow-focus system or external microphone can improve your overall video quality. Ensure that all added components are compatible with your camera and gimbal setup to maintain balanced and stable shooting.
Fine-Tuning Your Settings for Optimal Performance
After assembling and balancing your gimbal, fine-tuning settings is critical for optimal performance. Begin by adjusting the motor strength based on the weight of your specific camera and gear combination. Most gimbals allow users to select different modes—such as pan-follow or lock mode—based on their shooting requirements.
Moreover, practice using the gimbal in various environments. Familiarizing yourself with your gimbal’s responsiveness can help you adapt quickly in real shooting scenarios.
Filming Techniques with a Gimbal Camera
Now that your gimbal camera is set up and ready to roll, mastering filming techniques greatly enhances the quality of your footage. By planning your shots, incorporating smooth movement, and experimenting with creative angles, you can elevate your video production significantly.
Planning Your Shots for Maximum Effect
Careful pre-planning is essential for capturing engaging shots. Storyboarding your project outlines the narrative flow and defines key moments to emphasize. Consider employing techniques such as the rule of thirds and leading lines to create visually compelling shots.
Utilizing the gimbal’s movement capabilities at this stage enables you to plan tracking shots or pans that guide the viewer’s eye. Practicing various shots before actual filming can provide further insight into your gimbal’s capabilities and limitations.
Incorporating Smooth Movement in Your Shots
The hallmark of gimbal footage is its fluid movement. To achieve this, practice slow and deliberate panning and tilting, focusing on smooth transitions when moving from one shot to another. The gimbal’s ability to stabilize motion allows filmmakers to experiment with dynamic movements without sacrificing quality.
Additionally, employing techniques such as walk-and-follow or orbiting around subjects can create engaging visual narratives. This adds depth and intrigue to your footage, keeping your audience captivated throughout.
Creative Angles and Perspectives to Try
Don’t shy away from experimenting with unconventional angles and perspectives. Placing the gimbal low to the ground can capture dramatic, cinematic shots, while high angles can provide an expansive view of the subject or scene. Incorporate movements like the “drone shot” effect, where the gimbal glides smoothly upward, revealing a wider landscape.
Utilizing creative angles can significantly enhance storytelling, making even simple scenes more dynamic and interesting. Always be on the lookout for unique perspectives that can add dimension and narrative depth.
Post-Production Tips for Gimbal Footage
Once you’ve captured your footage, the next step is post-production. Editing, color grading, and showcasing your work are pivotal in ensuring that your video shines. Here are some best practices to consider when working with gimbal footage during post-production.
Editing Techniques for Smooth Results
Editing stabilized footage requires a few specific techniques to further enhance its appeal. First and foremost, consider using a non-linear editing software that allows you to manipulate clip speeds, transitions, and effects efficiently.
Employing slow-motion effects during dramatic sequences can significantly elevate the impact of your storytelling. Ensure transitions between clips are smooth to maintain flow, and utilize fades or cuts carefully to avoid jarring transitions. Consider placing music or soundtrack elements that complement your visuals to enhance the overall experience.
Color Grading and Enhancing Stabilized Footage
Color grading is an essential aspect of post-production that can transform your footage from good to exceptional. Utilizing color correction tools enables you to adjust for lighting discrepancies and achieve a consistent tone throughout your video.
Experiment with LUTs (Lookup Tables) designed to create mood or atmosphere that align with your narrative. This can add a professional polish to your stabilized footage, ensuring that it resonates with your audience on an emotional level.
Sharing and Showcasing Your Work
Finally, once your video is complete, consider how you will share and showcase it. Platforms such as social media, YouTube, or personal websites serve as excellent venues for sharing your work with a broader audience. Prioritize quality over quantity; a well-crafted video holds more value than several hastily produced clips.
Engage with your audience by soliciting feedback and responding to comments, creating a community around your content. Showcase not just the final product but also behind-the-scenes footage to highlight the effort and creativity that went into capturing those smooth, stunning shots.
Conclusion
Mastering the art of filmmaking with a gimbal camera is a journey that combines understanding technology with creative exploration. As filmmakers, embracing the capabilities of a gimbal opens new avenues for storytelling, resulting in stunning video narratives that resonate with audiences. By choosing the right gimbal, setting it up correctly, mastering filming techniques, and executing effective post-production strategies, you can not only improve your technical proficiency but also unleash your creative potential.
As you dive deeper into the world of gimbal cameras, remember to continue learning, experimenting, and pushing the boundaries of your craft. Whether you’re shooting for personal projects or professional endeavors, the right gimbal will empower your vision and ensure that every frame is picture-perfect.